Hi All,
Installing hadoop is time taking process. It is not very difficult to understand.
Its installation add beauty in its functionality.
Here are all the steps...Follow all properly.
1. If you are new in ubuntu then need to update whole system by
mayank@mayank-Compaq-510:~$ sudo apt-get update
It will update whole system and fulfill all pending requirement of OS.
2. Need to install java version.
mayank@mayank-Compaq-510:~$ sudo apt-get install default-jdk

3. Add a dedicated user and group for hadoop functionality.
This step will be useful for configuration of all hadoop supported softwares.
mayank@mayank-Compaq-510:~$ sudo addgroup hadoop
mayank@mayank-Compaq-510:~$ sudo adduser --ingroup hadoop hduser
This step will create a group to hadoop and add hduser into hadoop group.
At that moment it will ask required details from user:
Adding user `hduser' ...
Adding new user `hduser' (1001) with group `hadoop' ...
Creating home directory `/home/hduser' ...
Copying files from `/etc/skel' ...
Enter new UNIX password:
Retype new UNIX password:
passwd: password updated successfully
Changing the user information for hduser
Enter the new value, or press ENTER for the default
Full Name []:
Room Number []:
Work Phone []:
Home Phone []:
Other []:
Is the information correct? [Y/n] Y
4. Installing SSH
Secure Shell (SSH) is a cryptographic network protocol for operating network services securely over an unsecured network.
ssh has two main components:
mayank@mayank-Compaq-510:~$ sudo apt-get install ssh
5. Now need to switch from normal user to hduser.
mayank@mayank-Compaq-510:~$ su hduser
This will prompt for entering password.
6. hduser@mayank-Compaq-510:/home/mayank$ ssh-keygen -t rsa -P ""
Generating public/private rsa key pair.
Enter file in which to save the key (/home/hduser/.ssh/id_rsa):
Created directory '/home/hduser/.ssh'.
Your identification has been saved in /home/hduser/.ssh/id_rsa.
Your public key has been saved in /home/hduser/.ssh/id_rsa.pub.
The key fingerprint is:
50:6b:f3:fc:0f:32:bf:30:79:c2:41:71:26:cc:7d:e3 hduser@laptop
The key's randomart image is:
+--[ RSA 2048]----+
7. Now need to transfer key to authorized key so that it will not ask for password at the time of starting services.
hduser@mayank-Compaq-510:/home/mayank$ cat $HOME/.ssh/id_rsa.pub >> $HOME/.ssh/authorized_keys
we can check it by :
hduser@mayank-Compaq-510:/home/mayank$ ssh localhost
The authenticity of host 'localhost (127.0.0.1)' can't be established.
ECDSA key fingerprint is e1:8b:a0:a5:75:ef:f4:b4:5e:a9:ed:be:64:be:5c:2f.
Are you sure you want to continue connecting (yes/no)? yes
Warning: Permanently added 'localhost' (ECDSA) to the list of known hosts.
Welcome to Ubuntu 16.04.1 LTS (GNU/Linux 3.13.0-40-generic x86_64)
...
8. Install Hadoop
Now system is ready for installing the hadoop. We
hduser@mayank-Compaq-510:/home/mayank$ wget http://mirrors.sonic.net/apache/hadoop/common/hadoop-2.6.0/hadoop-2.6.0.tar.gz
hduser@mayank-Compaq-510:/home/mayank$ tar xvzf hadoop-2.6.0.tar.gz
hduser@mayank-Compaq-510:/home/mayank$ sudo mv * /usr/local/hadoop
[sudo] password for hduser:
hduser is not in the sudoers file. This incident will be reported.
* Note: It may ask to add hduser to group of sudoer list. For that case need to put command after exiting from current username.
hduser@mayank-Compaq-510:/home/mayank$ exit
mayank@mayank-Compaq-510:~$ sudo adduser hduser sudo
[sudo] password for k:
Adding user `hduser' to group `sudo' ...
Adding user hduser to group sudo
Done.
Now, the hduser has root priviledge, we can move the Hadoop installation to the /usr/local/hadoop directory without any problem:
mayank@mayank-Compaq-510:~$ sudo su hduser
hduser@mayank-Compaq-510:/home/mayank$ sudo mv * /usr/local/hadoop
hduser@mayank-Compaq-510:/home/mayank$ sudo chown -R hduser:hadoop /usr/local/hadoop
9. Setup Configuration Files
The following files will have to be modified to complete the Hadoop setup:
i) ~/.bashrc
ii) /usr/local/hadoop/etc/hadoop/hadoop-env.sh
iii) /usr/local/hadoop/etc/hadoop/core-site.xml
iv) /usr/local/hadoop/etc/hadoop/mapred-site.xml.template
v) /usr/local/hadoop/etc/hadoop/hdfs-site.xml
i) ~/.bashrc
Before editing the .bashrc file in our home directory, we need to find the path where Java has been installed to set the JAVA_HOME environment variable using the following command:
This file use to describe system configuration by set up all path.

Note that path may differ from this one. You need to give same path where java is located.
For that may try "which java"
ii) /usr/local/hadoop/etc/hadoop/hadoop-env.sh
Environment variables that are used in the scripts to run Hadoop.

iii) /usr/local/hadoop/etc/hadoop/core-site.xml
Configuration settings for Hadoop Core such as I/O settings that are common to HDFS and MapReduce.
The /usr/local/hadoop/etc/hadoop/core-site.xml file contains configuration properties that Hadoop uses when starting up.
This file can be used to override the default settings that Hadoop starts with.
hduser@mayank-Compaq-510:/home/mayank$ sudo mkdir -p /app/hadoop/tmp
hduser@mayank-Compaq-510:/home/mayank$ sudo chown hduser:hadoop /app/hadoop/tmp

copy paste following line:
<configuration>
<property>
<name>hadoop.tmp.dir</name>
<value>/app/hadoop/tmp</value>
<description>A base for other temporary directories.</description>
</property>
<property>
<name>fs.default.name</name>
<value>hdfs://localhost:54310</value>
<description>The name of the default file system. A URI whose
scheme and authority determine the FileSystem implementation. The
uri's scheme determines the config property (fs.SCHEME.impl) naming
the FileSystem implementation class. The uri's authority is used to
determine the host, port, etc. for a filesystem.</description>
</property>
</configuration>
iv) /usr/local/hadoop/etc/hadoop/mapred-site.xml.template
Configuration settings for MapReduce daemons : the job-tracker and the task-trackers.
By default, the /usr/local/hadoop/etc/hadoop/ folder contains
/usr/local/hadoop/etc/hadoop/mapred-site.xml.template
file which has to be renamed/copied with the name mapred-site.xml:
hduser@mayank-Compaq-510:/home/mayank$ cp /usr/local/hadoop/etc/hadoop/mapred-site.xml.template /usr/local/hadoop/etc/hadoop/mapred-site.xml

The mapred-site.xml file is used to specify which framework is being used for MapReduce.
We need to enter the following content in between the <configuration></configuration> tag:
<configuration>
<property>
<name>mapred.job.tracker</name>
<value>localhost:54311</value>
<description>The host and port that the MapReduce job tracker runs
at. If "local", then jobs are run in-process as a single map
and reduce task.
</description>
</property>
</configuration>
v) /usr/local/hadoop/etc/hadoop/hdfs-site.xml
Configuration settings for HDFS daemons, the namenode, the secondary namenode and the data nodes.
The /usr/local/hadoop/etc/hadoop/hdfs-site.xml file needs to be configured for each host in the cluster that is being used.
It is used to specify the directories which will be used as the namenode and the datanode on that host.
Before editing this file, we need to create two directories which will contain the namenode and the datanode for this Hadoop installation.
This can be done using the following commands:
hduser@mayank-Compaq-510:/home/mayank$ sudo mkdir -p /usr/local/hadoop_store/hdfs/namenode
hduser@mayank-Compaq-510:/home/mayank$ sudo mkdir -p /usr/local/hadoop_store/hdfs/datanode
hduser@mayank-Compaq-510:/home/mayank$ sudo chown -R hduser:hadoop /usr/local/hadoop_store
Now open /usr/local/hadoop/etc/hadoop/hdfs-site.xml

<configuration>
<property>
<name>dfs.replication</name>
<value>1</value>
<description>Default block replication.
The actual number of replications can be specified when the file is created.
The default is used if replication is not specified in create time.
</description>
</property>
<property>
<name>dfs.namenode.name.dir</name>
<value>file:/usr/local/hadoop_store/hdfs/namenode</value>
</property>
<property>
<name>dfs.datanode.data.dir</name>
<value>file:/usr/local/hadoop_store/hdfs/datanode</value>
</property>
</configuration>
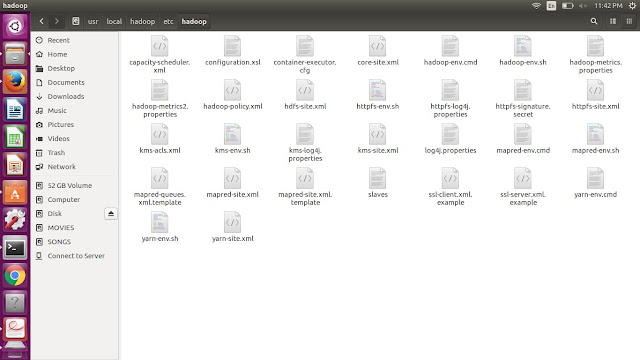
Summarization of all configuration files:

Physically we can check it:
10. Format the New Hadoop Filesystem
Now, the Hadoop file system needs to be formatted so that we can start to use it. The format command should be issued with write permission since it creates current directory
under /usr/local/hadoop_store/hdfs/namenode folder:
hduser@mayank-Compaq-510:/home/mayank$ hadoop namenode -format
Note that hadoop namenode -format command should be executed once before we start using Hadoop.
If this command is executed again after Hadoop has been used, it'll destroy all the data on the Hadoop file system.
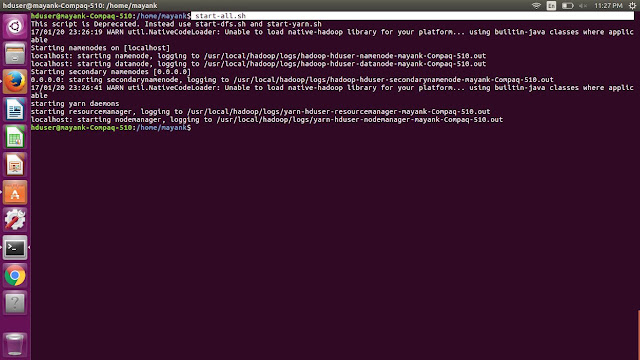
Check all daemons are running:

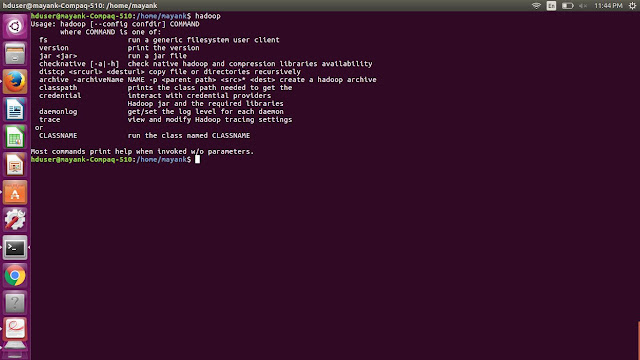
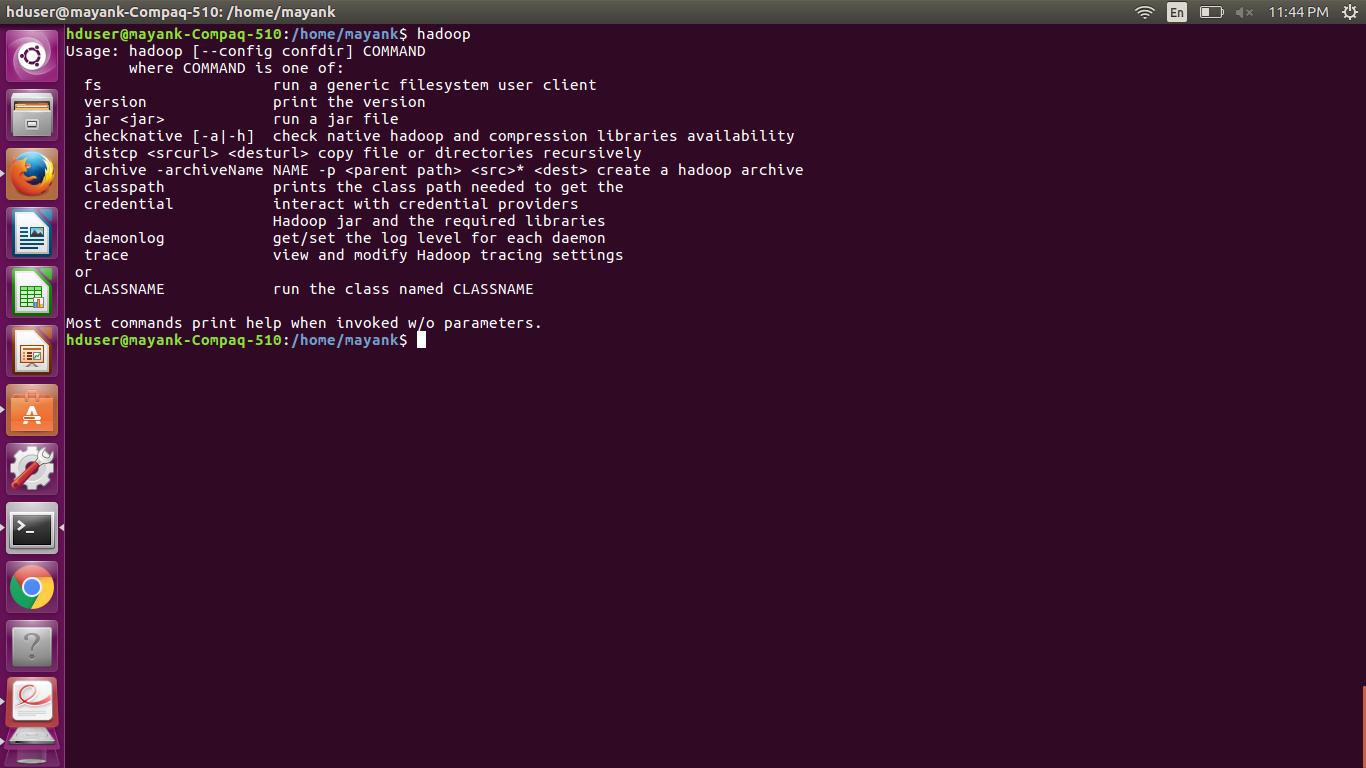
Check hadoop is working or not:
Installing hadoop is time taking process. It is not very difficult to understand.
Its installation add beauty in its functionality.
Here are all the steps...Follow all properly.
1. If you are new in ubuntu then need to update whole system by
mayank@mayank-Compaq-510:~$ sudo apt-get update
It will update whole system and fulfill all pending requirement of OS.
2. Need to install java version.
mayank@mayank-Compaq-510:~$ sudo apt-get install default-jdk

3. Add a dedicated user and group for hadoop functionality.
This step will be useful for configuration of all hadoop supported softwares.
mayank@mayank-Compaq-510:~$ sudo addgroup hadoop
mayank@mayank-Compaq-510:~$ sudo adduser --ingroup hadoop hduser
This step will create a group to hadoop and add hduser into hadoop group.
At that moment it will ask required details from user:
Adding user `hduser' ...
Adding new user `hduser' (1001) with group `hadoop' ...
Creating home directory `/home/hduser' ...
Copying files from `/etc/skel' ...
Enter new UNIX password:
Retype new UNIX password:
passwd: password updated successfully
Changing the user information for hduser
Enter the new value, or press ENTER for the default
Full Name []:
Room Number []:
Work Phone []:
Home Phone []:
Other []:
Is the information correct? [Y/n] Y
4. Installing SSH
Secure Shell (SSH) is a cryptographic network protocol for operating network services securely over an unsecured network.
ssh has two main components:
- ssh : The command we use to connect to remote machines - the client.
- sshd : The daemon that is running on the server and allows clients to connect to the server.
mayank@mayank-Compaq-510:~$ sudo apt-get install ssh
5. Now need to switch from normal user to hduser.
mayank@mayank-Compaq-510:~$ su hduser
This will prompt for entering password.
6. hduser@mayank-Compaq-510:/home/mayank$ ssh-keygen -t rsa -P ""
Generating public/private rsa key pair.
Enter file in which to save the key (/home/hduser/.ssh/id_rsa):
Created directory '/home/hduser/.ssh'.
Your identification has been saved in /home/hduser/.ssh/id_rsa.
Your public key has been saved in /home/hduser/.ssh/id_rsa.pub.
The key fingerprint is:
50:6b:f3:fc:0f:32:bf:30:79:c2:41:71:26:cc:7d:e3 hduser@laptop
The key's randomart image is:
+--[ RSA 2048]----+
|        .oo.o    |
|       . .o=. o  |
|      . + .  o . |
|       o =    E  |
|        S +      |
|         . +     |
|          O +    |
|           O o   |
|            o..  |
+-----------------+
7. Now need to transfer key to authorized key so that it will not ask for password at the time of starting services.
hduser@mayank-Compaq-510:/home/mayank$ cat $HOME/.ssh/id_rsa.pub >> $HOME/.ssh/authorized_keys
we can check it by :
hduser@mayank-Compaq-510:/home/mayank$ ssh localhost
The authenticity of host 'localhost (127.0.0.1)' can't be established.
ECDSA key fingerprint is e1:8b:a0:a5:75:ef:f4:b4:5e:a9:ed:be:64:be:5c:2f.
Are you sure you want to continue connecting (yes/no)? yes
Warning: Permanently added 'localhost' (ECDSA) to the list of known hosts.
Welcome to Ubuntu 16.04.1 LTS (GNU/Linux 3.13.0-40-generic x86_64)
...
8. Install Hadoop
Now system is ready for installing the hadoop. We
hduser@mayank-Compaq-510:/home/mayank$ wget http://mirrors.sonic.net/apache/hadoop/common/hadoop-2.6.0/hadoop-2.6.0.tar.gz
hduser@mayank-Compaq-510:/home/mayank$ tar xvzf hadoop-2.6.0.tar.gz
hduser@mayank-Compaq-510:/home/mayank$ sudo mv * /usr/local/hadoop
[sudo] password for hduser:
hduser is not in the sudoers file. This incident will be reported.
* Note: It may ask to add hduser to group of sudoer list. For that case need to put command after exiting from current username.
hduser@mayank-Compaq-510:/home/mayank$ exit
mayank@mayank-Compaq-510:~$ sudo adduser hduser sudo
[sudo] password for k:
Adding user `hduser' to group `sudo' ...
Adding user hduser to group sudo
Done.
Now, the hduser has root priviledge, we can move the Hadoop installation to the /usr/local/hadoop directory without any problem:
mayank@mayank-Compaq-510:~$ sudo su hduser
hduser@mayank-Compaq-510:/home/mayank$ sudo mv * /usr/local/hadoop
hduser@mayank-Compaq-510:/home/mayank$ sudo chown -R hduser:hadoop /usr/local/hadoop
9. Setup Configuration Files
The following files will have to be modified to complete the Hadoop setup:
i) ~/.bashrc
ii) /usr/local/hadoop/etc/hadoop/hadoop-env.sh
iii) /usr/local/hadoop/etc/hadoop/core-site.xml
iv) /usr/local/hadoop/etc/hadoop/mapred-site.xml.template
v) /usr/local/hadoop/etc/hadoop/hdfs-site.xml
i) ~/.bashrc
Before editing the .bashrc file in our home directory, we need to find the path where Java has been installed to set the JAVA_HOME environment variable using the following command:
This file use to describe system configuration by set up all path.

Note that path may differ from this one. You need to give same path where java is located.
For that may try "which java"
ii) /usr/local/hadoop/etc/hadoop/hadoop-env.sh
Environment variables that are used in the scripts to run Hadoop.

iii) /usr/local/hadoop/etc/hadoop/core-site.xml
Configuration settings for Hadoop Core such as I/O settings that are common to HDFS and MapReduce.
The /usr/local/hadoop/etc/hadoop/core-site.xml file contains configuration properties that Hadoop uses when starting up.
This file can be used to override the default settings that Hadoop starts with.
hduser@mayank-Compaq-510:/home/mayank$ sudo mkdir -p /app/hadoop/tmp
hduser@mayank-Compaq-510:/home/mayank$ sudo chown hduser:hadoop /app/hadoop/tmp

copy paste following line:
<configuration>
<property>
<name>hadoop.tmp.dir</name>
<value>/app/hadoop/tmp</value>
<description>A base for other temporary directories.</description>
</property>
<property>
<name>fs.default.name</name>
<value>hdfs://localhost:54310</value>
<description>The name of the default file system. A URI whose
scheme and authority determine the FileSystem implementation. The
uri's scheme determines the config property (fs.SCHEME.impl) naming
the FileSystem implementation class. The uri's authority is used to
determine the host, port, etc. for a filesystem.</description>
</property>
</configuration>
iv) /usr/local/hadoop/etc/hadoop/mapred-site.xml.template
Configuration settings for MapReduce daemons : the job-tracker and the task-trackers.
By default, the /usr/local/hadoop/etc/hadoop/ folder contains
/usr/local/hadoop/etc/hadoop/mapred-site.xml.template
file which has to be renamed/copied with the name mapred-site.xml:
hduser@mayank-Compaq-510:/home/mayank$ cp /usr/local/hadoop/etc/hadoop/mapred-site.xml.template /usr/local/hadoop/etc/hadoop/mapred-site.xml

The mapred-site.xml file is used to specify which framework is being used for MapReduce.
We need to enter the following content in between the <configuration></configuration> tag:
<configuration>
<property>
<name>mapred.job.tracker</name>
<value>localhost:54311</value>
<description>The host and port that the MapReduce job tracker runs
at. If "local", then jobs are run in-process as a single map
and reduce task.
</description>
</property>
</configuration>
v) /usr/local/hadoop/etc/hadoop/hdfs-site.xml
Configuration settings for HDFS daemons, the namenode, the secondary namenode and the data nodes.
The /usr/local/hadoop/etc/hadoop/hdfs-site.xml file needs to be configured for each host in the cluster that is being used.
It is used to specify the directories which will be used as the namenode and the datanode on that host.
Before editing this file, we need to create two directories which will contain the namenode and the datanode for this Hadoop installation.
This can be done using the following commands:
hduser@mayank-Compaq-510:/home/mayank$ sudo mkdir -p /usr/local/hadoop_store/hdfs/namenode
hduser@mayank-Compaq-510:/home/mayank$ sudo mkdir -p /usr/local/hadoop_store/hdfs/datanode
hduser@mayank-Compaq-510:/home/mayank$ sudo chown -R hduser:hadoop /usr/local/hadoop_store
Now open /usr/local/hadoop/etc/hadoop/hdfs-site.xml

<configuration>
<property>
<name>dfs.replication</name>
<value>1</value>
<description>Default block replication.
The actual number of replications can be specified when the file is created.
The default is used if replication is not specified in create time.
</description>
</property>
<property>
<name>dfs.namenode.name.dir</name>
<value>file:/usr/local/hadoop_store/hdfs/namenode</value>
</property>
<property>
<name>dfs.datanode.data.dir</name>
<value>file:/usr/local/hadoop_store/hdfs/datanode</value>
</property>
</configuration>
Summarization of all configuration files:

Physically we can check it:

10. Format the New Hadoop Filesystem
Now, the Hadoop file system needs to be formatted so that we can start to use it. The format command should be issued with write permission since it creates current directory
under /usr/local/hadoop_store/hdfs/namenode folder:
hduser@mayank-Compaq-510:/home/mayank$ hadoop namenode -format
Note that hadoop namenode -format command should be executed once before we start using Hadoop.
If this command is executed again after Hadoop has been used, it'll destroy all the data on the Hadoop file system.

Check all daemons are running:

Check hadoop is working or not:
badhia sir
ReplyDelete